How to Create a Thriving Windowsill Herb Garden
- Alex Brooke
- Dec 13, 2024
- 9 min read
I adore having fresh herbs within arm’s reach while cooking, and a windowsill herb garden is the perfect solution. Not only does it add a touch of greenery to your kitchen, but it’s also a great way to ensure you always have the freshest flavors at your fingertips. In this post, I’ll guide you through the simple process of creating your own windowsill herb garden, from choosing the right herbs to providing the ideal growing conditions. With just a few easy steps, you’ll be enjoying fragrant, flavorful herbs in no time!
Choosing the Right Herbs
Before you start planting, it’s imperative to select the right herbs for your windowsill garden. With so many varieties to choose from, it can be overwhelming, but don’t worry, I’m here to guide you through the process. When opting for herbs, consider what you’ll be using them for – cooking, medicinal purposes, or simply for their fragrance and beauty.
Think about your personal preferences and the types of dishes you enjoy cooking. Do you love Italian food? Basil and oregano might be great additions. Are you a fan of Mexican cuisine? Cilantro and chili peppers could be the way to go. By choosing herbs that resonate with your lifestyle, you’ll be more likely to use and enjoy them.
Popular Herb Options for Windowsill Gardens
Options abound when it comes to selecting herbs for your windowsill garden. Some popular choices include mint, parsley, rosemary, thyme, and chives. These herbs are not only easy to grow but also offer a variety of flavors and textures to enhance your cooking. Mint, for example, is perfect for teas and cocktails, while parsley adds a fresh, bright flavor to salads and soups.
Beyond these popular options, consider growing herbs like lemongrass, dill, or tarragon, which can add unique flavors to your dishes. If you’re new to herb gardening, start with a few easy-to-grow varieties and experiment as you gain more experience.
Considerations for Climate and Light Exposure
One of the most critical factors in choosing the right herbs for your windowsill garden is considering the climate and light exposure in your area. Most herbs require at least four to six hours of direct sunlight per day, but some can tolerate partial shade.
Climate is another imperative factor to consider. If you live in a hot, dry climate, you may want to choose herbs that are drought-tolerant, such as rosemary or thyme. In cooler, more humid climates, herbs like mint or parsley may thrive.
Climate also plays a significant role in determining which herbs will grow well in your area. For example, if you live in a region with harsh winters, you may want to choose herbs that can be grown indoors year-round, such as basil or cilantro. By taking these factors into account, you’ll be able to create a thriving windowsill herb garden that brings joy and flavor to your life.
Preparing the Windowsill
Some of the most important steps in creating a thriving windowsill herb garden take place before you even plant your first seedling. In this chapter, I’ll guide you through the crucial preparations to ensure your herbs have the best possible start in life. Getting your windowsill ready for its new inhabitants is a straightforward process, but it does require some attention to detail. By following these simple steps, you’ll be rewarded with a healthy and happy herb garden that will provide you with fresh flavors all year round.
Cleaning and Disinfecting the Area
Behind every successful herb garden lies a clean and hygienic environment. Dirt, grime, and bacteria can quickly spread disease and pests, so it’s crucial to give your windowsill a thorough clean before introducing your herbs. Start by wiping down the sill with a damp cloth to remove any dirt, dust, or debris that may have accumulated. Next, mix a solution of equal parts water and white vinegar in a spray bottle. Spray the solution onto the windowsill and let it sit for a few minutes to allow the acidity to break down any tough stains or bacteria. Then, wipe the area clean with a fresh cloth, making sure to remove any excess moisture. Your windowsill is now ready for its new inhabitants!
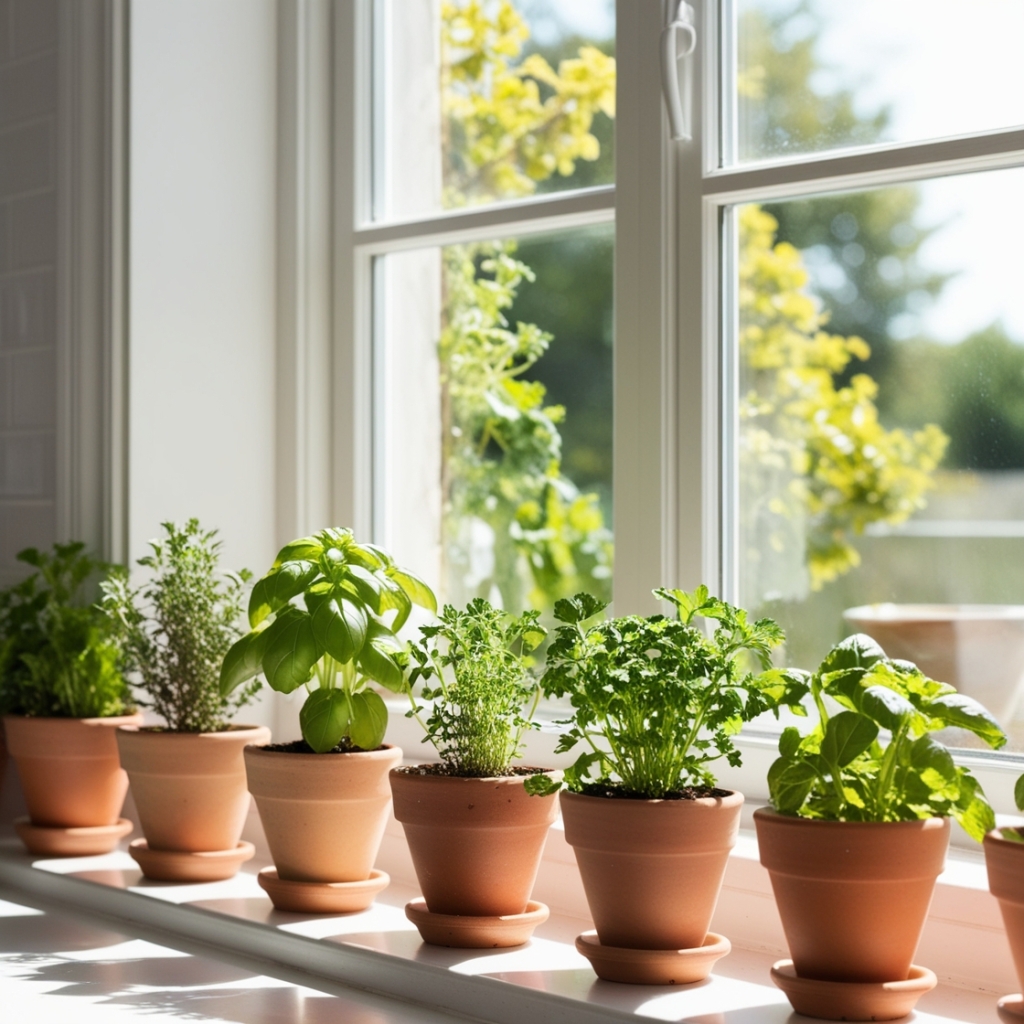
Selecting the Perfect Container or Planter
After you’ve cleaned and disinfected your windowsill, it’s time to think about the container or planter that will become home to your herbs. This is a crucial decision, as the right container can make all the difference in the health and happiness of your plants. When choosing a container, consider the size, material, and drainage capabilities. You’ll want a container that is large enough to accommodate the mature size of your herbs, yet small enough to fit comfortably on your windowsill. I prefer containers made from natural materials like terracotta or wood, as they tend to breathe better and won’t retain too much water. In addition, think about the style and aesthetic you want to achieve with your windowsill herb garden. Do you prefer a modern and sleek look, or a more rustic and charming feel? Whatever your style, there’s a container out there to suit your taste and complement your herbs.
Planting and Soil Selection
You’ve chosen your herbs and prepared your windowsill; now it’s time to plant them. This is the fun part! When planting your herbs, make sure to leave enough space between each pot for proper air circulation and growth. A general rule of thumb is to plant them about 6-8 inches apart. This will give the roots room to spread out and the leaves room to breathe.
I like to think of planting herbs as giving them a new home. You want to make sure they have everything they need to thrive. That’s why selecting the right soil is so important. Herbs need well-draining soil to prevent waterlogged roots, which can lead to root rot and other problems.
Tips for Planting Herbs in Small Spaces
After selecting the perfect soil, it’s time to think about planting your herbs in small spaces. Since windowsills often have limited real estate, you’ll want to make the most of it. Here are a few tips to keep in mind:
Choose compact or dwarf varieties of herbs that are specifically bred for small spaces.
Use shallow pots or planters to maximize vertical space.
Consider using a trellis or obelisk to train vining herbs like mint or lemongrass to grow upwards.
Any herb can be pruned to maintain a smaller shape, so don’t be afraid to trim back your plants to keep them bushy and full.
The Importance of Well-Draining Soil
Among the most important factors in creating a thriving windowsill herb garden is the soil. Herbs need soil that drains excess water quickly to prevent root rot and other problems. I’ve seen many herb gardens fail due to waterlogged soil, so don’t skip this step!
At its core, well-draining soil is all about balance. You want your soil to retain enough moisture to keep your herbs hydrated, but not so much that it becomes waterlogged. A good rule of thumb is to look for a potting mix that contains a combination of peat moss, vermiculite, and perlite. These ingredients will help your soil drain excess water while still retaining enough moisture to support healthy growth.
Watering and Maintenance
After your windowsill herb garden is all set up, it’s vital to keep your herbs happy and healthy with proper watering and maintenance. This will ensure they continue to thrive and provide you with fresh flavors all season long.
I’ve found that the key to successful herb gardening is finding a balance between giving your plants enough water and not overwatering them. Herbs need consistent moisture, especially when they’re producing new growth, but their roots can rot if the soil is too soggy.
How Often to Water Your Herbs
Maintenance of your herb garden begins with watering. I check my herb plants daily, especially during hot summer months. If the top inch of soil feels dry to the touch, it’s time to water. Be sure to water at the base of the plant, avoiding the leaves to prevent fungal diseases.
As a general rule, I water my herb plants when the soil feels dry to the touch, usually every 2-3 days in the summer and less often in the spring and fall. However, this may vary depending on the temperature, humidity, and light exposure in your area, so be sure to monitor your plants closely.
Pruning and Fertilizing for Optimal Growth
Often, I’m asked how to keep herbs bushy and full. The secret lies in regular pruning and fertilizing. Pruning encourages herbs to produce more stems and leaves, while fertilizing provides them with the necessary nutrients for healthy growth.
I like to prune my herbs regularly, pinching off flower buds to direct the plant’s energy towards leaf production. I also trim back long stems to encourage branching and prevent the plant from becoming leggy.
In addition, I fertilize my herb plants every 1-2 weeks during the growing season with a balanced, water-soluble fertilizer. This gives them an extra boost of nutrients to promote healthy growth and flavor.
Dealing with Common Issues
Unlike a traditional outdoor garden, a windowsill herb garden can be more prone to certain issues due to its indoor environment. But don’t worry, with a little attention and care, you can easily overcome these common problems and enjoy a thriving herb garden.
As you tend to your windowsill herb garden, you may encounter some challenges that can affect the health and appearance of your herbs. From pests and diseases to wilting leaves and slow growth, there are several issues that can arise. But by being proactive and taking the right steps, you can prevent and solve these problems and keep your herb garden happy and healthy.
Pest Control and Disease Prevention
Beneath the surface of your herb garden, pests and diseases can be lurking, waiting to strike. Check your plants regularly for signs of infestation or infection, such as whiteflies, spider mites, or powdery mildew. To prevent these issues, make sure to provide good air circulation, keep your pots clean, and avoid overwatering.
For more severe infestations or infections, I recommend using organic pest control methods whenever possible. Neem oil, insecticidal soap, and horticultural oil are all effective and gentle on your herbs. And if you do encounter disease, remove affected leaves or stems immediately to prevent the spread of the infection.
Solving Common Problems with Windowsill Herb Gardens
By paying close attention to your herb garden, you can catch potential problems before they become major issues. Keep an eye out for signs of nutrient deficiency, such as yellowing leaves or stunted growth, and adjust your fertilizer routine accordingly.
If you notice your herbs are becoming leggy or spindly, it may be a sign that they’re not getting enough light. Consider moving your pots to a brighter location or supplementing with grow lights.
With a little patience and persistence, you can overcome any obstacle that comes your way and enjoy a thriving windowsill herb garden. So don’t be discouraged if you encounter a few bumps along the way – simply take a deep breath, assess the situation, and take the necessary steps to get your herbs back on track.
Enjoying Your Harvest
Once again, the moment of truth has arrived! After nurturing your windowsill herb garden, it’s time to reap the rewards of your hard work. As you gaze upon your lush, fragrant herbs, you can’t help but feel a sense of pride and accomplishment. Now, it’s time to enjoy the fruits of your labor and get creative with your fresh harvest.
I love experimenting with new recipes and ideas that showcase my homegrown herbs. Whether you’re a seasoned cook or a culinary newbie, having fresh herbs at your fingertips can elevate even the simplest dishes. From classic pairings like basil and tomatoes to more adventurous combinations, the possibilities are endless. In the following sections, I’ll share some tips on when to harvest your fresh herbs and provide inspiration for using them in creative ways.
When to Harvest Your Fresh Herbs
Between regular watering and pruning, it’s important to know when to harvest your herbs to ensure they remain healthy and productive. For most herbs, the best time to harvest is in the morning, after the dew has dried but before the heat of the day sets in. This helps prevent moisture from accumulating on the leaves, which can lead to fungal diseases.
I like to harvest my herbs when they’re at their peak flavor and aroma. Pinch or cut off the top sets of leaves, leaving about one-third of the stem intact. This encourages new growth and prevents the herb from flowering. Regular harvesting will also encourage bushy growth and prevent your herbs from becoming leggy.
Creative Ways to Use Your Homegrown Herbs
About now, you’re probably wondering what to do with your bounty of fresh herbs. The good news is that the possibilities are endless! From flavorful teas and infused oils to fragrant potpourri and beauty treatments, your homegrown herbs can be used in a variety of creative ways.
This is where the real fun begins! You can add fresh herbs to soups, salads, and sauces, or use them to create marinades and rubs for meats and vegetables. I also love making herbal vinegars, which add a tangy flavor to dressings and sauces. And let’s not forget about the decorative possibilities – a bouquet of fresh herbs can add a pop of color and fragrance to any room.
This is just the beginning of your herbal journey. As you experiment with different recipes and ideas, you’ll discover the joy of cooking with fresh, homegrown ingredients. Happy harvesting and happy cooking!
Before You Go
With these considerations in mind, I’m confident that you’ll be well on your way to creating a thriving windowsill herb garden that will bring fresh flavor and fragrance to your cooking. From choosing the right herbs for your climate and light conditions, to selecting the perfect planter and soil, every detail counts when it comes to cultivating a healthy and happy herb garden.
As you begin on this delightful journey, I encourage you to experiment with different herb combinations, pruning techniques, and creative ways to display your garden. With a little patience and TLC, your windowsill herb garden will become a treasured addition to your kitchen, providing you with an endless supply of fresh herbs and inspiration for years to come. Happy gardening!
Comments